 "ttyymmnn" (ttyymmnn)
01/06/2016 at 10:45 ē Filed to: None
 1
1
 55
55
 "ttyymmnn" (ttyymmnn)
01/06/2016 at 10:45 ē Filed to: None |  1 1
|  55 55 |
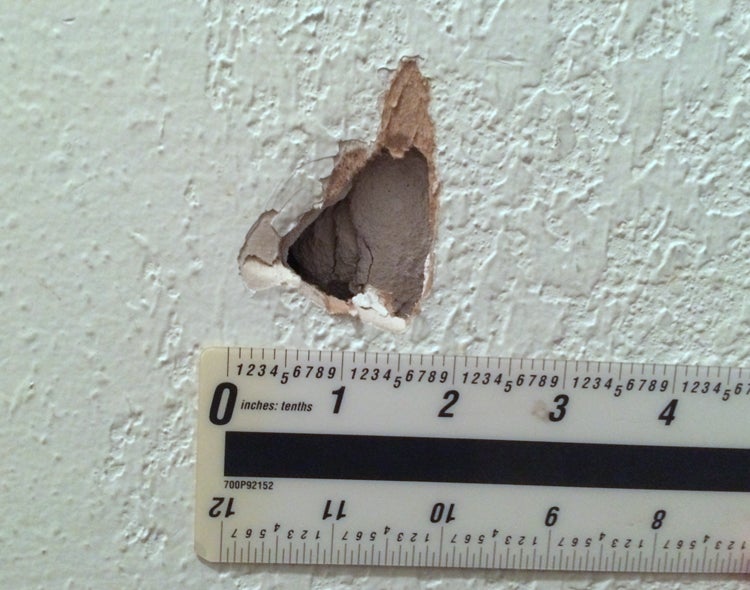
How hard would it be to repair this hole in the drywall myself and have it look decent? I have zero experience with this.
 Jordan and the Slowrunner, Boomer Intensifies
> ttyymmnn
01/06/2016 at 10:49 |
|
1. Place duct tape over hole.
2. Paint duct tape correct color.
 Eberle-Hills-Cop
> ttyymmnn
01/06/2016 at 10:51 |
|
Easy. Looks small enough to just fill with compound & sand. Matching the paint would be the only annoying bit.
 ttyymmnn
> Jordan and the Slowrunner, Boomer Intensifies
01/06/2016 at 10:51 |
|
Nailed it.
 Patrick Nichols
> ttyymmnn
01/06/2016 at 10:51 |
|
Pretty easy if you have the proper textured paint around to match at the end.
 Tripper
> ttyymmnn
01/06/2016 at 10:52 |
|
Real easy. Smash a bunch of Spackle in there, let it dry. Put some more on, smooth it out, let it dry. Sand, paint.
 Agrajag
> ttyymmnn
01/06/2016 at 10:53 |
|
The difficult part will be matching the textured finish.
Otherwise use one of these self stick repair sheets then spackle over that.
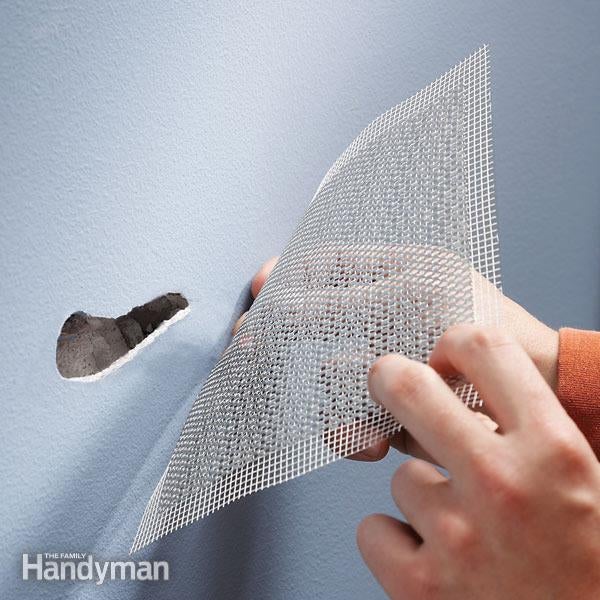
Sand and paint.
 MontegoMan562 is a Capri RS Owner
> ttyymmnn
01/06/2016 at 10:53 |
|
http://www.homedepot.com/p/HDX-4-in-x-4Ö
Place over hole, puddy over, sand, puddy again, sand, paint
DONE
 ttyymmnn
> Agrajag
01/06/2016 at 10:54 |
|
The difficult part will be matching the textured finish.
I know. Itís small enough, and itís in a hallway, so that may not be all that big a problem.
 ttyymmnn
> Eberle-Hills-Cop
01/06/2016 at 10:55 |
|
It will be painted a new color when Iím done. I have to fix this before painting. Itís the texture Iím concerned about.
 Patrick Nichols
> Patrick Nichols
01/06/2016 at 10:56 |
|
scratch that. just the color. you can get spray cans of texture and do whatís called a ďknock downĒ effect where you just lightly press in a downward motion the texture before it dries.
 ttyymmnn
> MontegoMan562 is a Capri RS Owner
01/06/2016 at 10:56 |
|
But what about the texture? Itís a small hole, so it wouldnít be the end of the world if it were smooth, but it will be noticeable.
 OPPOsaurus WRX
> ttyymmnn
01/06/2016 at 10:58 |
|
its not bad at all.
http://www.homedepot.com/p/DAP-8-oz-DryÖ
this has the mesh, compound and spreading knive. I just did it not too long ago.
 Jordan and the Slowrunner, Boomer Intensifies
> ttyymmnn
01/06/2016 at 10:58 |
|
That works too I guess.
 zeontestpilot
> ttyymmnn
01/06/2016 at 10:59 |
|
Really easy. If needed, put that textured tape across it (no idea what it's called) and just apply spackle. The toughest part would be making sure it's flat. I'd recommend a metal putty knife, as the disposable ones slowly degrade in quality.
 crowmolly
> ttyymmnn
01/06/2016 at 11:00 |
|
Is that a doorknob hit?
 RamblinRover Luxury-Yacht
> ttyymmnn
01/06/2016 at 11:01 |
|
Thereís actually a difficult part, Part II, and that is that with the texture the patch piece will sit much higher on the surface and not blend in cleanly - it would be a bulge. Were it me, Iíd sand down the hole patch area and just use drywall mud, then try to retexture. What youíve got is a variant of ďorange peelĒ texture, so getting a spray can to do orange peel texture from Lowes (itís designed to spit ďgobsĒ of thick stuff at the wall) would help.
 Wacko
> ttyymmnn
01/06/2016 at 11:01 |
|
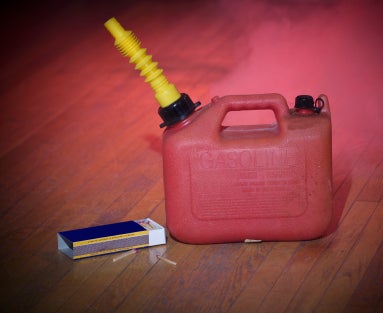
this fixes everything, and you house becomes a supercar.
 StingrayJake
> Agrajag
01/06/2016 at 11:01 |
|
Iíve done this before. Itís fairly easy. Be sure to get the right paint though.
 MonkeePuzzle
> ttyymmnn
01/06/2016 at 11:02 |
|
1: open ms-paint
2: use copy paste
3: blend
done
5minutes, max
 Highlander-Datsuns are Forever
> ttyymmnn
01/06/2016 at 11:02 |
|
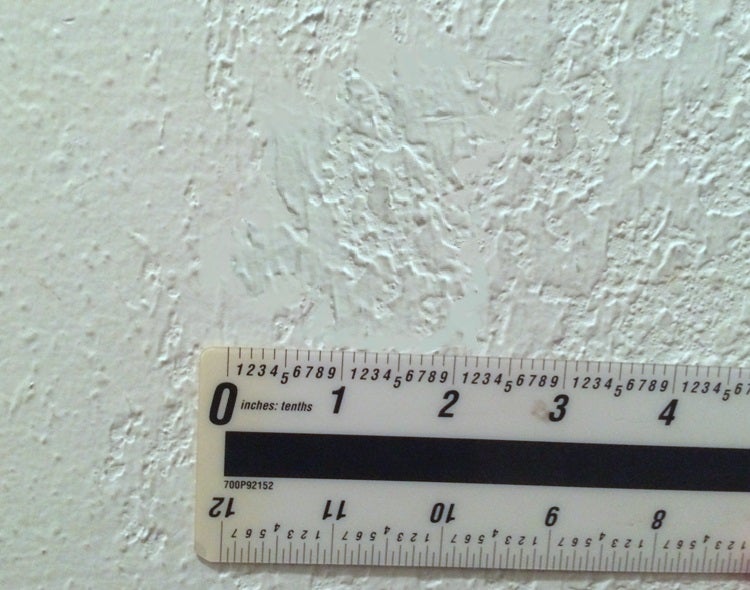
Once filled in texture with mud using a rough sponge, might need to add a little water to your mud. After itís painted you will never know there was a hole there. You can usually buy smaller containers of dry wall mud and repair patch material at the hardware store.
 jariten1781
> ttyymmnn
01/06/2016 at 11:02 |
|
That thingís tiny. Iíd just use joint tape rather than a big olí self sticking patch or cutting a drywall patch. Wouldnít even bother trying to texture and if you have some old paint out in the garage this is easy....apply joint tape, apply spackle or compound (whateverís cheapest), sand, repeat compound/sand and necessary, paint and done.
 ttyymmnn
> jariten1781
01/06/2016 at 11:04 |
|
The whole wall (itís a hallway) will be getting new paint when Iím done.
 ttyymmnn
> Highlander-Datsuns are Forever
01/06/2016 at 11:04 |
|
So, thatís the technical term for the wall texture? Mud?
 ttyymmnn
> MonkeePuzzle
01/06/2016 at 11:05 |
|
Bob Fucking Vila, ladies and gentlemen. Brilliant.
 ttyymmnn
> Wacko
01/06/2016 at 11:05 |
|
The Ultimate Solution.
 Agrajag
> ttyymmnn
01/06/2016 at 11:07 |
|
Maybe practice on a piece of cardboard or something. The way I would attempt it is by doing one layer of spackle and sanding it. Then do another lumpy layer on top of that so that if viewed from the side it would look like a mountain range. Then take the knife and try to smear/knock down the mountain tops. My comparison is silly but it might work.
 RamblinRover Luxury-Yacht
> ttyymmnn
01/06/2016 at 11:08 |
|
Drywall mud refers to the normal drywall joint compound/filler. Which in your case a layer of was added to the wall after first installation and hole-filling to sort of stucco it. They even have spray guns to shoot the gypsum slime at the wall with.
 ttyymmnn
> crowmolly
01/06/2016 at 11:08 |
|
No, itís a sippy cup. About 8 years ago (itís been there that long), I was trying to get my twins to take a nap, and I was totally stressed out and needed the break desperately. I gave one boy his cup of warm milk, but he said it was too cold. I warmed it up and he said it was a too hot. Who are you, fucking Goldilocks?! Somehow, the cup flew out of my hand and hit the wall. I have no idea how it happened.
 ttyymmnn
> RamblinRover Luxury-Yacht
01/06/2016 at 11:08 |
|
Interesting. Thanks for the tip.
 ttyymmnn
> RamblinRover Luxury-Yacht
01/06/2016 at 11:09 |
|
Gotcha.
 Jcarr
> ttyymmnn
01/06/2016 at 11:10 |
|
I repaired a baseball-sized hole in our old house with one of these kits. Very simple. Like he said, the hardest part is getting the texture. Canít help you there as our wall was smooth and we added texture to it later.
 davedave1111
> ttyymmnn
01/06/2016 at 11:11 |
|
Mending the hole is easy. Fill the deep part with crumpled newspaper, then give it a skim of filler over the top. The hard part is either matching the existing textured wallpaper, or stripping the old stuff off the rest of the wall.
If you have any spare paper, try using it as a stamp - the texture will be reversed, but thatíll be less noticeable than a flat patch.
 Shane MacGowan's Teeth
> ttyymmnn
01/06/2016 at 11:13 |
|
Thereís some misconceptions about the texture down below. The patching is easy, texturing will be a bit more complex. It isnít a paint as mentioned by others- they spray mud on the drywall with a gun in a random pattern, then run over it with a flat knife. So to fix- get a patch kit, patch it, sand, let dry and all. Then put some blobs and dots of mud, and run a knife over it to knock them down. Let dry and paint. Take a look at this (should be queued up, if not, ~6:25)- you can simulate what the gun is doing by hand for a small area.
 Klaus Schmoll
> ttyymmnn
01/06/2016 at 11:13 |
|
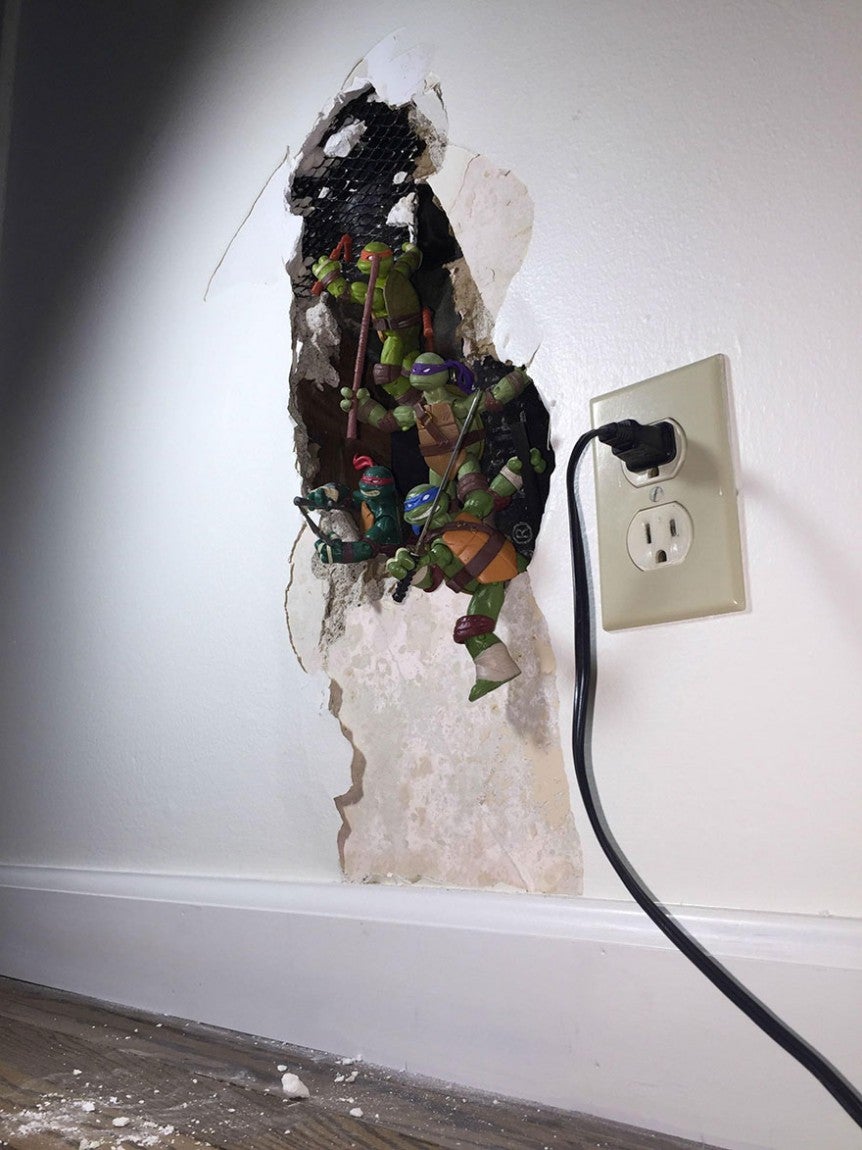
Easy!
 ttyymmnn
> davedave1111
01/06/2016 at 11:13 |
|
Itís not wallpaper, itís some sort of plaster coating. Having read the replies, and seeing as the hole is only 2x2, I may just fill it and forget the texture. I like your wadded newspaper idea.
 ttyymmnn
> Shane MacGowan's Teeth
01/06/2016 at 11:15 |
|
Thanks for the detailed info. Iím beginning to wonder, though, it itís worth messing with the texture. Itís a pretty small spot, in a hallway, about three feet off the floor (not at eye level) and Iím going to paint the whole thing a shade of brown when Iím done.
 MonkeePuzzle
> ttyymmnn
01/06/2016 at 11:18 |
|
I used to share a house with my two brothers while my parents lived overseas. We learned a LOT about drywall repair. Of course, a well placed poster or picture of the queen works just as well
 Shane MacGowan's Teeth
> ttyymmnn
01/06/2016 at 11:19 |
|
Itís really not that hard, if youíre just doing a small patch. If youíre leveling out the repaired area already, all this is adding is tossing some mud on (literally, dip fingers in it and just flick them on the wall until it looks spattered, then run the knife over). The texture itself would be a few minutes work, plus some extra drying time.
 Steve Zissou
> ttyymmnn
01/06/2016 at 11:19 |
|
The texture may actually make it easier to do. If you have a perfectly smooth wall and you use join tape to span the gap, you have to feather out pretty far to make sure it all looks flat enough. With added texture causing confusion, you probably wonít need to feather out as far/worry about perfect smoothness.
Example: I had a popcorn ceiling I scraped smooth. After that I had to redo the joints because the previous installer didnít try that hard since it was being texturized...
 ttyymmnn
> Steve Zissou
01/06/2016 at 11:22 |
|
Popcorn ceilings are works of the devil. I have them all over my house, and as it is, the house is settling and the drywall on my ceiling is starting to separate. I would love to have the popcorn gone all over the house, but Iíd need to hire a drywall guy to fix the ceiling. The popcorn has never been painted, and Iíve heard that removing unpainted popcorn is a fairly easy, albeit messy, task.
 TheHondaBro
> ttyymmnn
01/06/2016 at 11:23 |
|
How about TWO holes in the drywall?
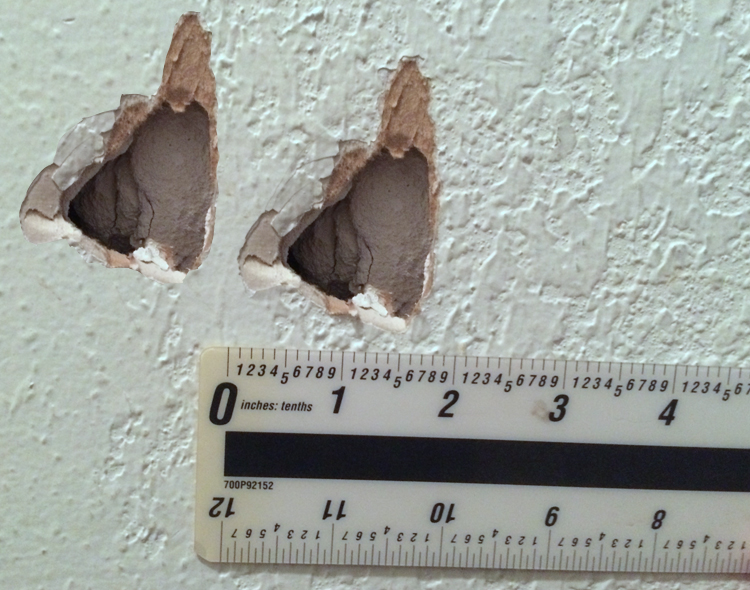
 ttyymmnn
> TheHondaBro
01/06/2016 at 11:24 |
|
Now YOU get to fix them both.
 TheHondaBro
> ttyymmnn
01/06/2016 at 11:24 |
|
Cover it with a portrait of your mother-in-law.
 For Sweden
> ttyymmnn
01/06/2016 at 11:29 |
|
Your best plan is to put walnut paneling throughout the residence.
 Highlander-Datsuns are Forever
> ttyymmnn
01/06/2016 at 11:30 |
|
What he said.
 vicali
> Wacko
01/06/2016 at 11:31 |
|
I second that, had to cut out a panel of drywall to access plumbing in a bathroom.. -it wasnít fun to put the panel back in and hide the seams.. lighting a match would have been easier.
 crowmolly
> ttyymmnn
01/06/2016 at 11:31 |
|
Ha. Most of us have been there.
Anyway, Iíd repair it as some of the others have described; with a patch and some compound.
For the texture, you can try something like this if it comes out poorly:
1.) Get some air drying clay from a place like Michaelís
2.) Form it into a 6Ē disc or so
3.) Press it on to the wall where there is good texture so it picks up the pattern
4.) Remove from wall and let dry
5.) Do your sanding and blending
6.) Do a light coat of mud and press the clay it into the wet spackle/mud/compound to leave a texture.
Might be overkill, or might be worth a shot. See how it looks after the initial blend.
 Wacko
> vicali
01/06/2016 at 11:35 |
|
plus if you do the gas can trick right, insurance pays to rebuild your house, and you get new clothes, appliances, TV, furniture... If you park your broken car close enough that get fixed too.
 davedave1111
> ttyymmnn
01/06/2016 at 11:42 |
|
Oh, I see, I thought it was woodchip. I guess if you want to try and match it, you could get some modelling clay, take an impression of another bit of wall, bake it, and use it as a stamp. But yeah, no-one except you will ever notice it once the wall is painted.
 MontegoMan562 is a Capri RS Owner
> ttyymmnn
01/06/2016 at 12:29 |
|
Well, what they said about the texture is very true, youíll have to apply the texture to it, such a small area a sponge is probably fine, I have to apply that crap to a massive wall soon so Iíve got my work cut out.
Iíve used one of those 4x4 patches on a similar hole on a smooth wall, you canít even tell the patch is there and itís stronger than doing just tape or mud over it. Gives it some structure.
 TheRealBicycleBuck
> ttyymmnn
01/06/2016 at 12:29 |
|
Itís super easy. Donít use one of those mesh patches - you will never get it to match and will always see a lump. Follow Tom Silvaís instructions or just watch this video.
 gmporschenut also a fan of hondas
> ttyymmnn
01/06/2016 at 13:19 |
|
http://www.thisoldhouse.com/toh/m/how-to/iÖ
I would follow this. I would try skipping the patch. And instead of using a large trowel to smooth the surface, use a small putty knife to apply blobs. Then sand with a priece of sandpaper on a sanding block(or piece of wood) to smooth out high points. It's tricky to intentially Do a crappy job, to get that texture.
 ttyymmnn
> gmporschenut also a fan of hondas
01/06/2016 at 13:22 |
|
Thanks. Iím thinking about fishing the broken piece out of the wall and trying to use that as my patch.
 That's gonna leave a mark!
> Eberle-Hills-Cop
01/06/2016 at 13:30 |
|
I agree but wouldnít bother sanding smooth. Fill the hole with compound but to well below the surface. Let dry. Come in with a another coat. Use three if necessary (the thicker you are the longer to dry and will likely shrink and crack). The last coat should be thin and slightly above the surface. Pull up and away on the compound to make small mountains. Take a drywall knife and knock down the mountain tops to be even with the rest of the wall. Keep the hole as small as possible and donít spread the compound much bigger than 1/8 inch larger than the hole. Paint the whole wall.
 Rusty Vandura - www.tinyurl.com/keepoppo
> ttyymmnn
01/06/2016 at 16:59 |
|
I can relate only too well.